Integration Guide
This document will use the project BosmaDemo as an example to guide developers to complete the import and integration of the SDK.
Resource file
- Demo project: SDK root / Sample
- Library folder: SDK root / library
- API documentation: SDK root / API
- SDK Integration Guide: SDK root / Document
Integrated SDK
Step 1: Import SDK
Method 1: Cocoapods import SDK
Cocoapods provides a simple dependency management system to avoid errors caused by manual import (first, users need to confirm that cocoapods has been installed. If users have not installed cocoapods, please refer to the installation guide on the official usersbsite). This document will use the project BosmaDemo as an example to guide developers to complete the import and integration of the SDK.
- Create an engineering project, such as BosmaDemo. Then create a BosmaSDK directory under the same level directory of the project, and copy the related library to the BosmaSDK, as shown in the following figure:


-
Create a
PodFilefile.2.1 Use the
cdcommand in the terminal to enter the directory where the project “BosmaDemo” is located, for example:cd /Users/Bosma/Desktop/SDK/BosmaDemo2.2 In the current directory, use vim to create a
Podfilevim Podfile2.3 Enter the following text in the
Podfilefile:install! 'cocoapods', :deterministic_uuids => false target 'BoemDemo' do pod 'BosmaBasic', :path => '../BosmaSDK/BosmaBasic' pod 'BosmaCore', :path => '../BosmaSDK/BosmaCore' pod 'BosmaMedia', :path => '../BosmaSDK/BosmaMedia' pod 'BosmaCamera', :path => '../BosmaSDK/BosmaCamera' pod 'BosmaLock', :path => '../BosmaSDK/BosmaLock' pod 'BosmaBridge', :path => '../BosmaSDK/BosmaBridge' pod 'BosmaKit', :path => '../BosmaSDK/BosmaKit' end2.4 Save and exit, the command to save and exit in vim environment is
:wq. Note: users need to press the ESC key before users can enter a command:wq2.5 Check whether the
podfilefile has been successfully created, as shown in the following figure
-
Import the SDK
3.1 Use the
cdcommand in the terminal to enter the directory where the project BosmaDemo is located. Run the pod install command to import the SDK, as shown in the figure belowpod install3.2 Open the project directory, find the
.xcworkspacefile and run it
Method 2: Import SDK manually
- Create a project, such as BosmaSDKDemo, add SDK and related libraries to the project, as shown in the following figure:

- 2.Decompress the SDK package, select "Add files to'BosmaSDKDemo'..." in Xcode, and add the relevant libraries to the project BosmaSDKDemo after decompression, as shown in the figure below:

- 3.Set Other Linker Flags to -ObjC in Build Settings

- 4.Check the Build Settings configuration
Check the Library Search Paths settings under Search Paths, for example: The BosmaSDK folder and the project fileBosmaSDKDemo.xcodeprojare in the same directory, as shown in the figure below.
Step 2: Add dependency library
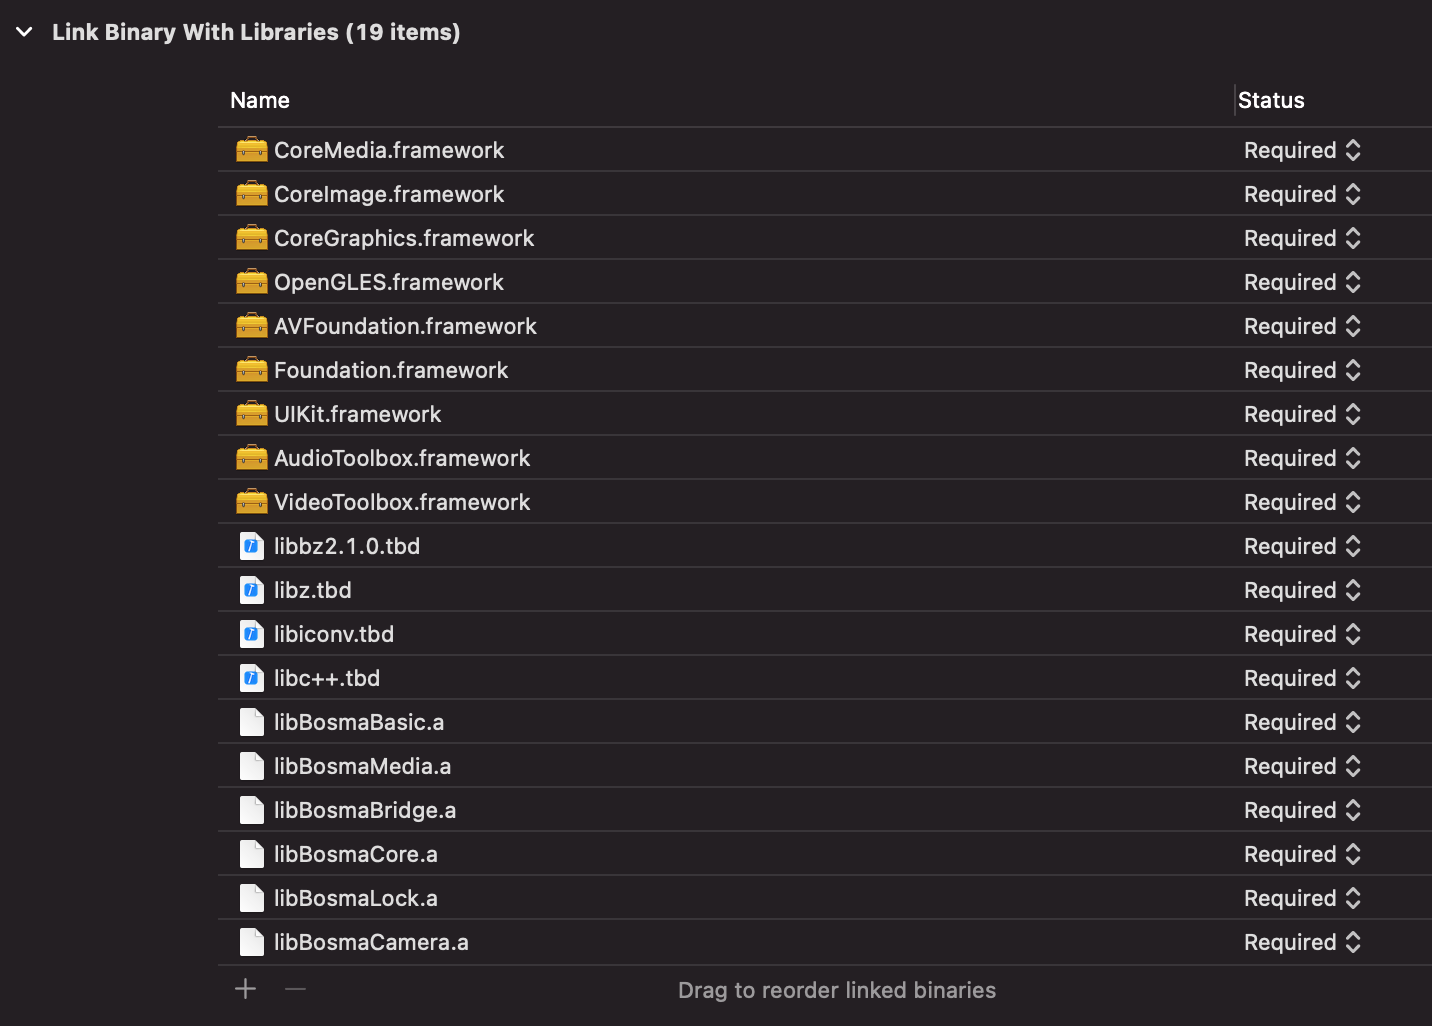
Add all of the following dependent libraries to the project

    libiconv.tbd
    libbz2.1.0.tbd
    libz.tbd
    libc++.tbd
    VideoToolbox.framework
    AudioToolbox.framework
    CoreGraphics.framework
    CoreMedia.framework
    CoreImage.framework
    OpenGLES.framework
    AVFoundation.framework
    Foundation.framework
    UIKit.framework
    libBosmaBasic.a
    libBosmaMedia.a
    libBosmaCamera.a
    libBosmaBridge.a
    libBosmaCore.a
    libBosmaLock.a
Step 3: Project configuration
- Set the Other Linker Flags to - Objc in Build Settings
- Add the following permissions to the
Inof.Plistfile

